
接上篇继续。
-
启动Fluent,激活选项Double Precision,同时激活并行计算
-
点击菜单File → Read → Mesh…打开网格文件bed.msh
-
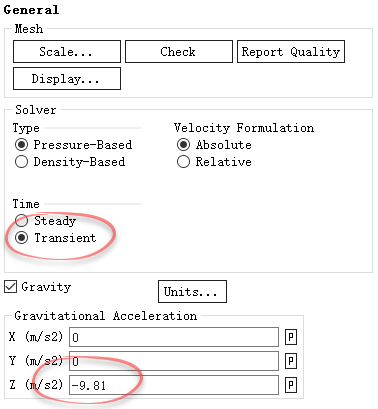
双击模型树节点General,右侧面板中选择选项Transient
-
激活选项Gravity,设置重力加速度为Z方向-9.81 m/s2
-
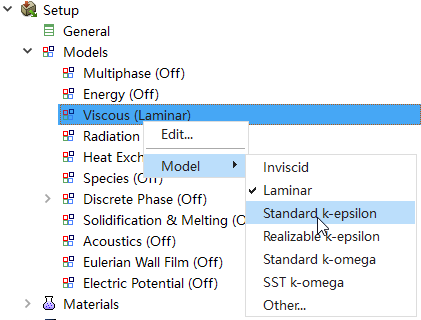
右键选择模型树节点Models > Viscous,点击弹出菜单Model → Standard k-epsilon选用标准KE模型
1、inlet设置
-
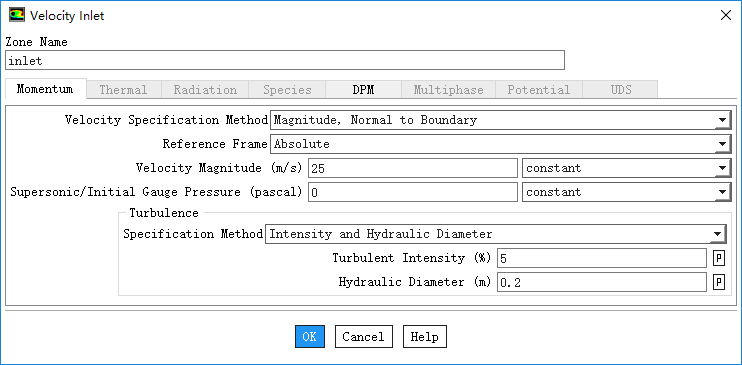
双击模型树节点Boundary Condtions > inlet,弹出入口设置对话框
-
设置Velocity Magnitude为10 m/s
-
其他参数如图所示,点击OK按钮关闭对话框
2、outlet设置
-
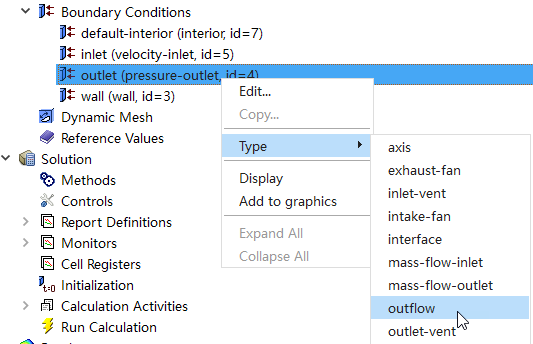
右键选择模型树节点Boundary Conditions > outlet,点击弹出菜单项Type → outflow将其类型转换为outflow
-
弹出对话框中采用默认参数设置
-
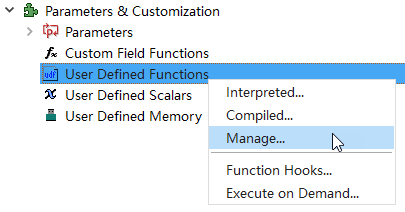
右键选择模型树节点Parameters & Customization > User Defined Functions,点击弹出菜单项Manage…打开UDF加载对话框
-
对话框中输入Library Name为lib_edem_coupling,点击按钮Load加载UDF

确保耦合文件夹lib_edem_coupling放在了当前工作路径下,否则load会失败。
-
UDF加载成功后,会在Models节点下添加新的EDEM Coupling节点。在设置耦合之前需要先设置EDEM。
-
启动EDEM,打开前面保存的文件bed5s.dem
-
点击工具栏按钮Simulator,切换至计算参数设置面板

-
按下图参数进行设置,设置Total Time为10 s
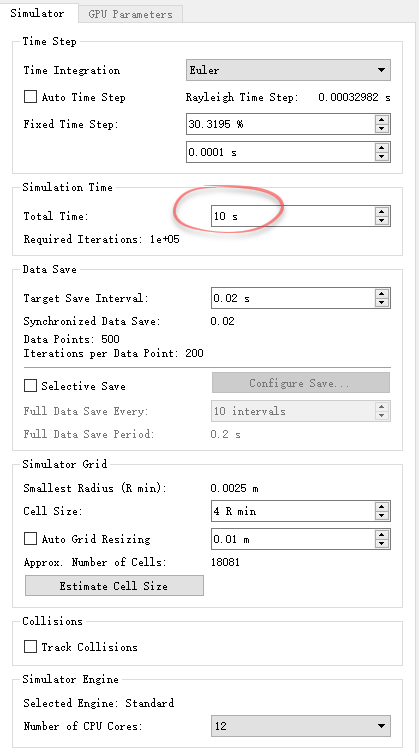
由于时间起点为5s,实际上是再算5s
-
点击工具栏按钮Start Coupling Server启动耦合服务
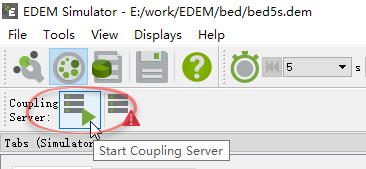
回到Fluent中继续设置。
-
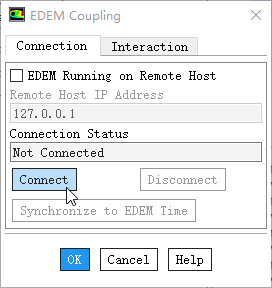
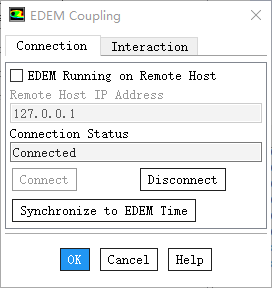
双击模型树节点Models > EDEM Coupling弹出耦合设置对话框
-
点击Connect按钮连接EDEM
-
连接成功后如图所示,出现Connected字样表示连接成功。
-
点击按钮Synchronize to EDEM Time
此处非常重要。EDEM并非从0时刻开始,因此将Fluent时间调整到与EDEM相同。
-
点击OK按钮关闭对话框
-
双击模型树节点Initialization,右侧面板按下图所示设置

-
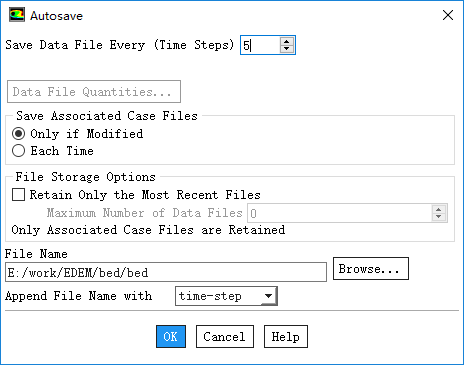
双击模型树节点Calculation Activities > Autosave弹出自动保存对话框
-
设置Save Data File Every为5
-
点击OK按钮关闭对话框
-
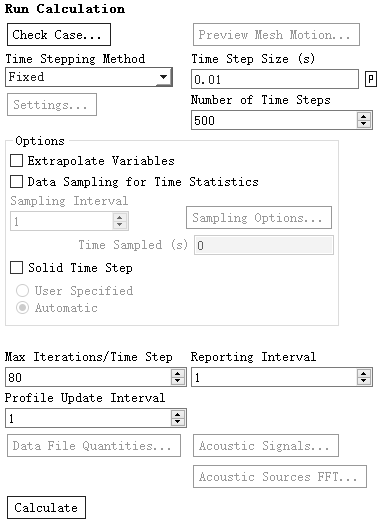
双击模型树节点Run Calculation
-
右侧面板设置Time Step Size为0.01 s
-
设置Number of Time Steps为500
-
设置Max Iterations/Times Step为80
-
点击按钮Calculate开始计算
本案例计算需要消耗极多的计算资源,各位有兴趣的自己算吧,我这小笔记本是搞不动了。
链接:https://pan.baidu.com/s/1dG00bq5 密码:7jhk
本耦合代码只支持并行单精度和并行双精度,因为Fluent 19.0无法开启串行计算。


本篇文章来源于微信公众号: CFD之道


评论前必须登录!
注册