
本案例利用Fluent中的Mixture多相流模型仿真计算离心泵内的空化情况。
本案例j几何如图所示。
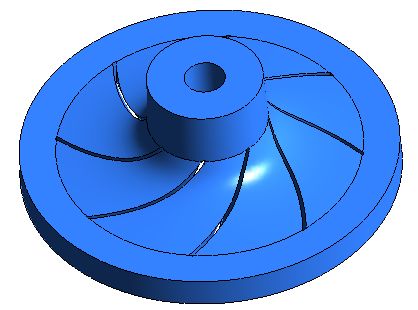
离心泵入口总压0.6 MPa,出口静压0.2 MPa,叶轮旋转速度1200 RPM。流体域内介质为液态水,其在当前工作条件下饱和蒸汽压为3540 Pa。
-
启动Fluent,选择Double Precision选项
-
利用菜单File → Import → CGNS → Mesh…打开文件选择对话框,选择网格文件pump fluent cavitacion.cgns
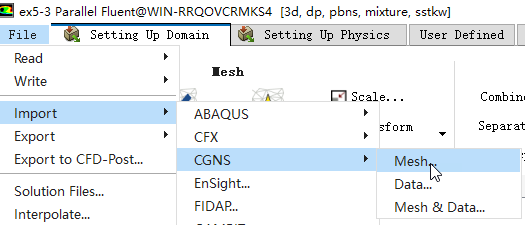
多相流计算通常需要开启双精度模式。CGNS是一种通用文件格式,可以存储网格和结果数据。
-
双击模型树节点General
-
点击右侧面板中的Check按钮检查网格,确保TUI窗口中没有错误或警告信息
-
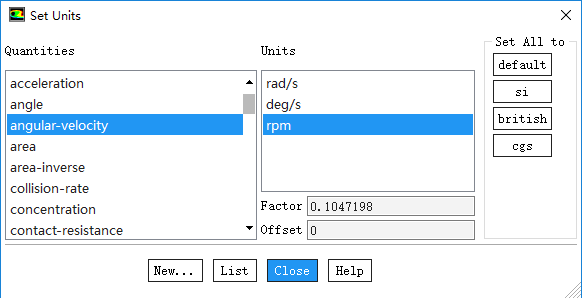
点击右侧面板按钮Units…弹出单位设置对话框,设置angular-velocity为rpm
-
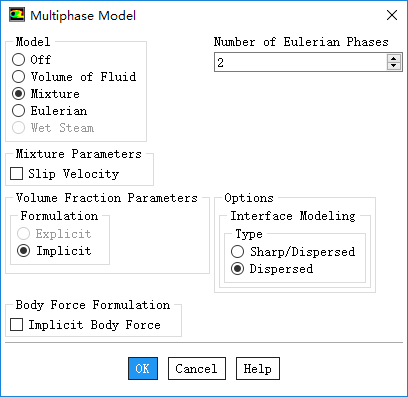
双击模型树节点Models > Multiphase,弹出多相流模型设置对话框
-
选择Mixture模型,取消选项Slip Velocity,设置Number of Eulerian Phases为2
-
点击OK按钮关闭对话框
-
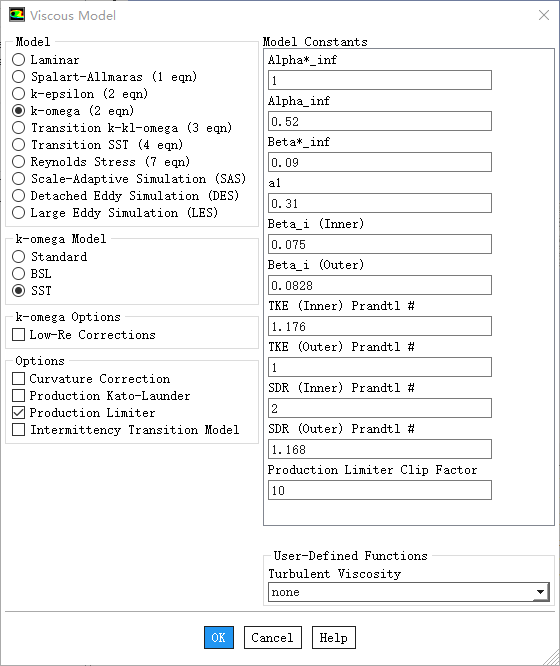
双击模型树节点Models > Viscous,弹出模型选择对话框,如下图所示,选择SST k-omega模型
-
点击OK按钮关闭对话框
从材料库中添加材料water-liquid及water-vapor,材料参数保持默认设置
-
设置water-liquid为主相,water-vapor为第二相。
-
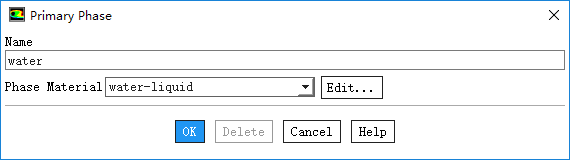
双击模型树节点Models > Multiphase(Mixture) > Phase > phase-1-Primary Phase,弹出主相设置对话框
-
设置Name为water,选择Phase Material为water-liquid
-
点击OK按钮关闭对话框
-
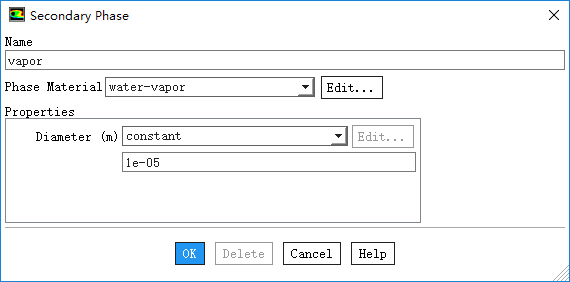
双击模型树节点Models > Multiphase(Mixture) > Phase > phase-2-Secondary-Phase,弹出第二相设置对话框
-
设置Name为vapor,选择Phase Material为water-vapor,其他参数保持默认设置
-
点击OK按钮关闭对话框
-
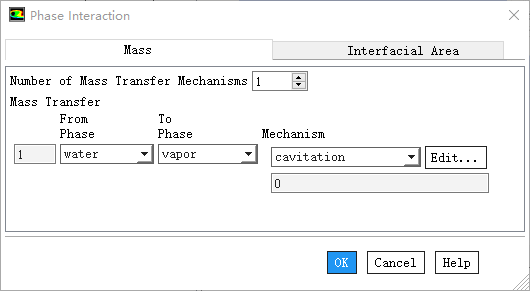
双击模型树节点Model >Multiphase > Phase Interactions,弹出设置对话框
-
设置Number of Mass Transfer Mechanisms为1
-
设置From Phase为water,设置To Phase为vapor
-
选择Mechanism为cavitation弹出空化模型设置对话框
-
弹出的对话框中选择Schnerr-Sauer模型,设置水的饱和蒸气压为3540 Pa
-
点击OK按钮关闭对话框
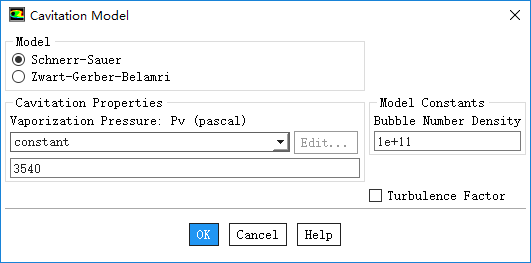
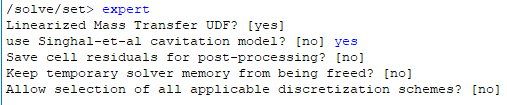
Fluent中除了上图所示的两种空化模型外,还隐藏了全空化模型Singhal-et-al Cavitation model,该模型只能在Mixture多相流模型下使用
-
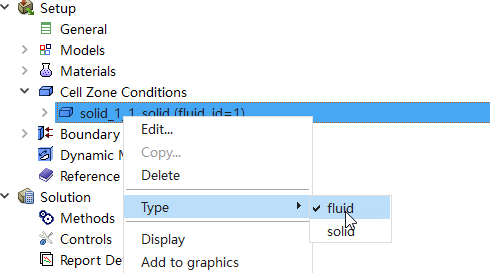
右键选择模型树节点Cell Zone Conditions > solid_1_1_solid,点击菜单项Type → fluid,弹出区域设置对话框
-
激活选项Frame Motion,设置Rotational Velocity为1200 rpm
-
设置Rotation-Axis Direction为(0 0 -1)
-
点击OK按钮关闭对话框
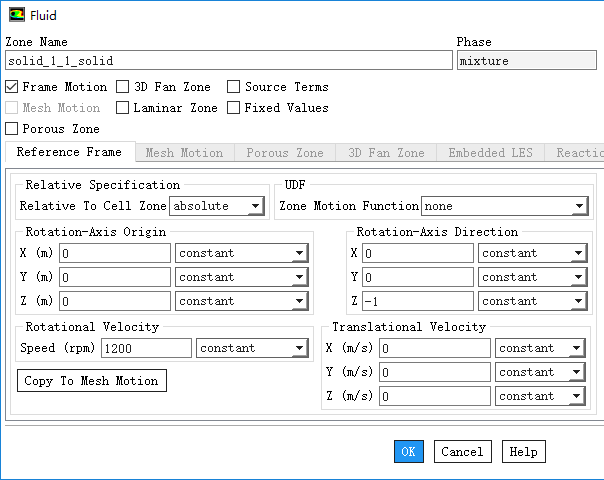
旋转方向采用右手定则确定
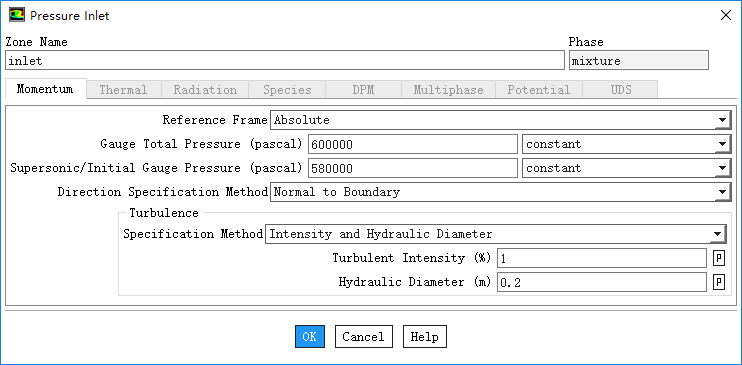
1. inlet设置
-
双击模型树节点Boundary Conditions > inlet,弹出入口设置对话框
采用如下图所示参数设置
2、outlet设置
-
双击模型树节点Boundary Conditions > outlet,弹出入口设置对话框
采用如下图所示参数设置

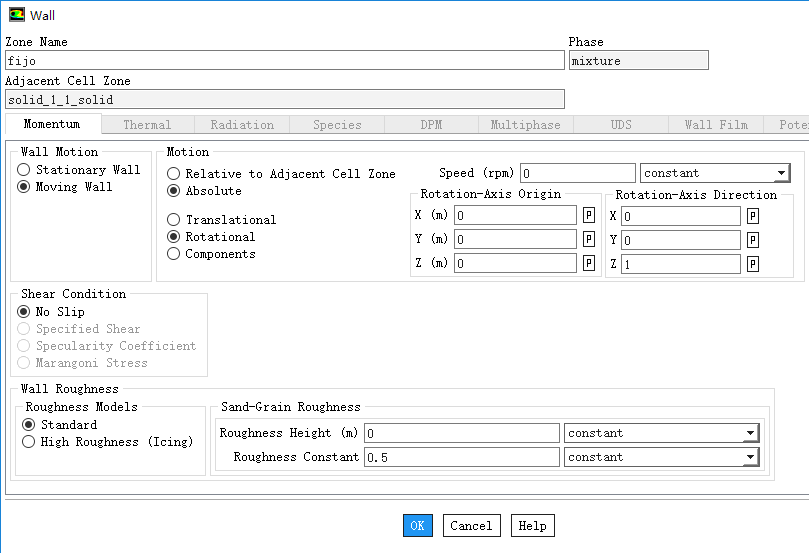
3、fijo边界设置
-
设置该边界为绝对静止。
-
双击模型树节点Boundary Conditions > fijo,弹出设置对话框
-
激活选项Moving Wall
-
设置选项Absolute及Rotational,并设置Speed为0
-
点击OK按钮关闭对话框
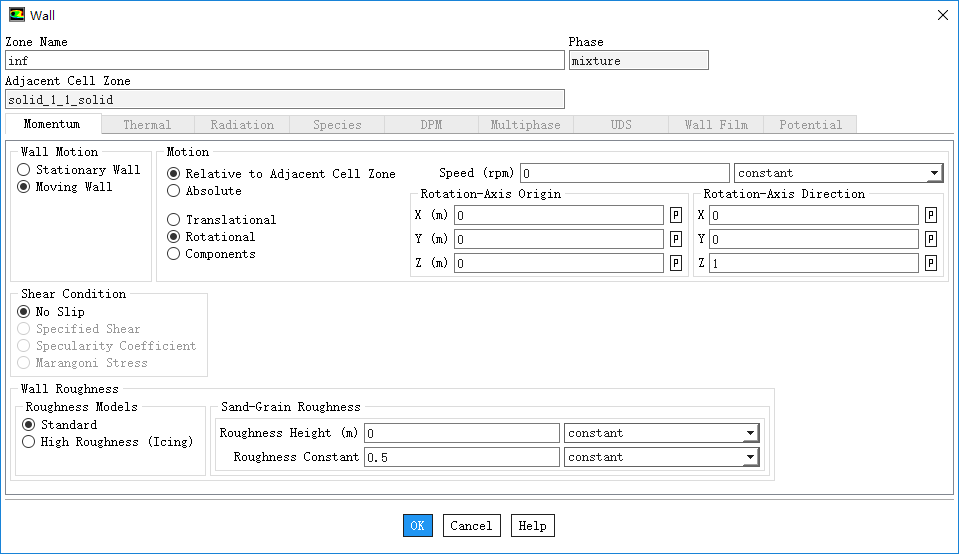
4、inf边界设置
-
双击模型树节点Boundary Conditions > inf,弹出设置对话框
-
激活选项Moving Wall
-
设置选项Relative to Adjacent Cell Zone及Rotational,并设置Speed为0
-
点击OK按钮关闭对话框
-
其他边界solid_1_1级sup边界采用与inf相同的边界条件,这可以用边界copy来实现
-
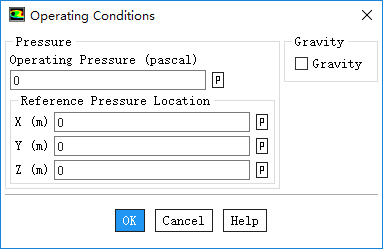
双击模型树节点Boundary Condtions,点击右侧面板按钮Operating Conditions…
-
弹出的对话框中设置Operating Pressure为0
-
点击OK按钮关闭对话框
-
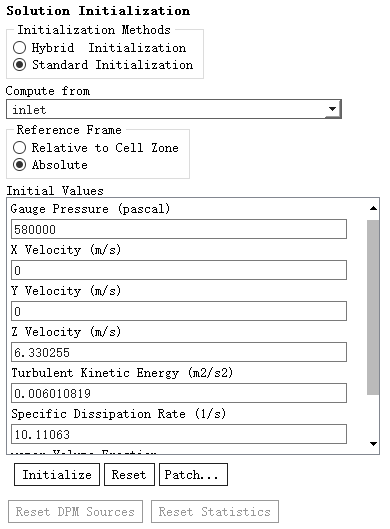
双击模型树节点Initialization,右侧面板中选择初始化方法为Standard Initialization
-
选择Compute from为inlet
-
点击Initialize按钮初始化计算
-
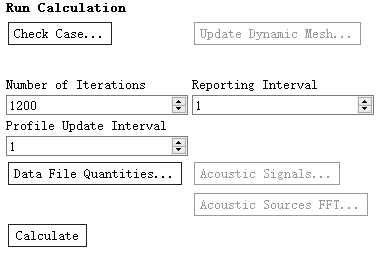
鼠标双击模型树节点Run Calculation
-
右侧面板中设置Number of Iterations为1200
-
点击按钮Calculate开始计算
1、查看压力分布
-
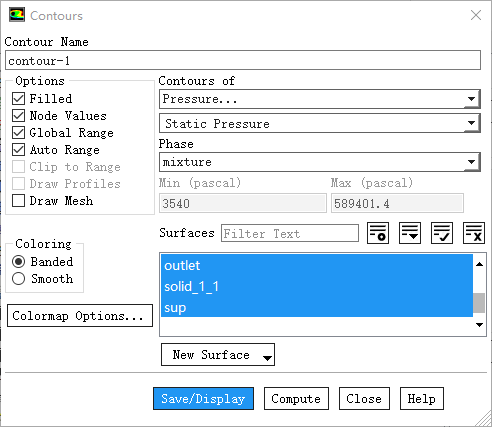
鼠标双击模型树节点Results > Graphics > Contours,弹出新建contours对话框
-
激活选项Filled
-
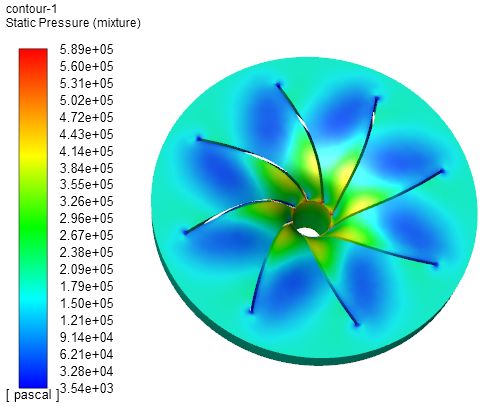
选择Contours of为Pressure及Static Pressure
-
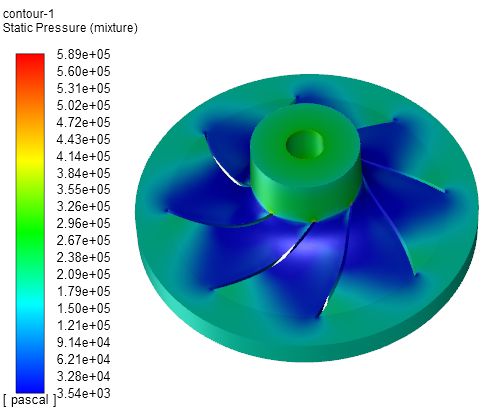
下方surface列表中选择除default_interior-1外的所有表面,点击Save/Display按钮显示压力分布
显示压力分布如图所示。
背面压力分布如图所示。
2、水蒸气分布
-
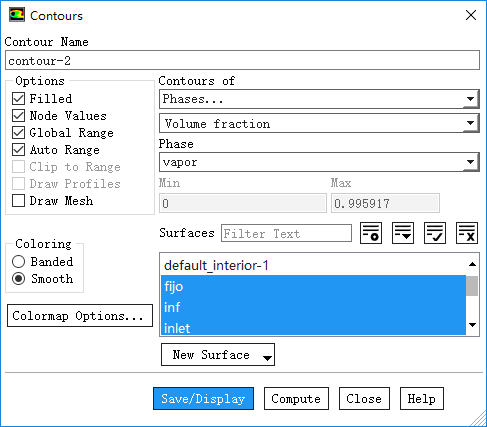
鼠标双击模型树节点Results > Graphics > Contours,弹出新建contours对话框
-
激活选项Filled
-
选择Contours of为Phases…及Volume fraction,选择Phase为vapor
-
下方surface列表中选择除default_interior-1外的所有表面,点击Save/Display按钮显示压力分布
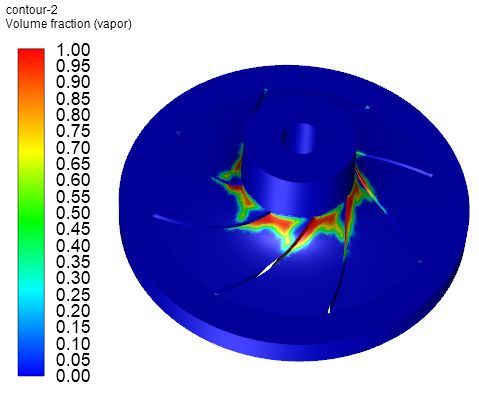
水蒸气分布如图所示。
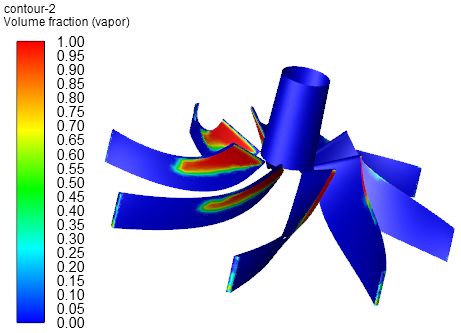
可以只显示叶片上水蒸气分布,如图所示。
链接:https://pan.baidu.com/s/1o9mAyoU 密码:w0pr
本篇文章来源于微信公众号: CFD之道


评论前必须登录!
注册