
本案例演示利用Fluent中提供的LB方法计算建筑物外流场。
这两年宣称支持格子-波兹曼方法计算流体的软件似乎有点儿多,Fluent的beta功能也增加了此方法。
1 问题描述
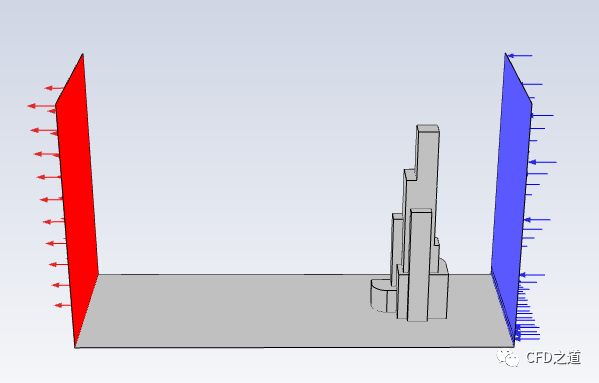
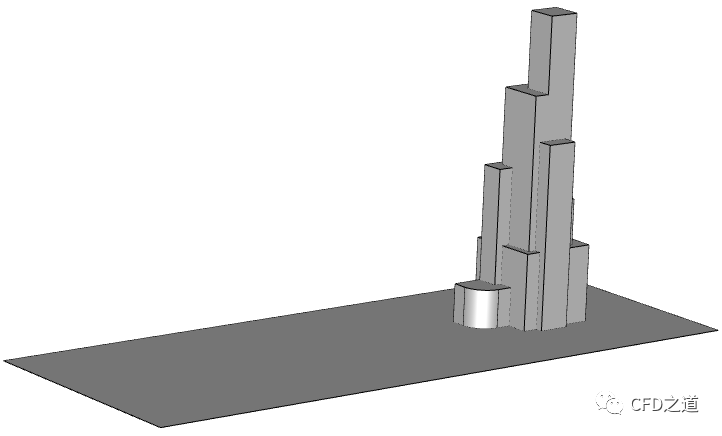
本案例计算来流条件下摩天大楼周围的流动情况。计算模型如下图所示。
2 Fluent设置
-
启动Fluent -
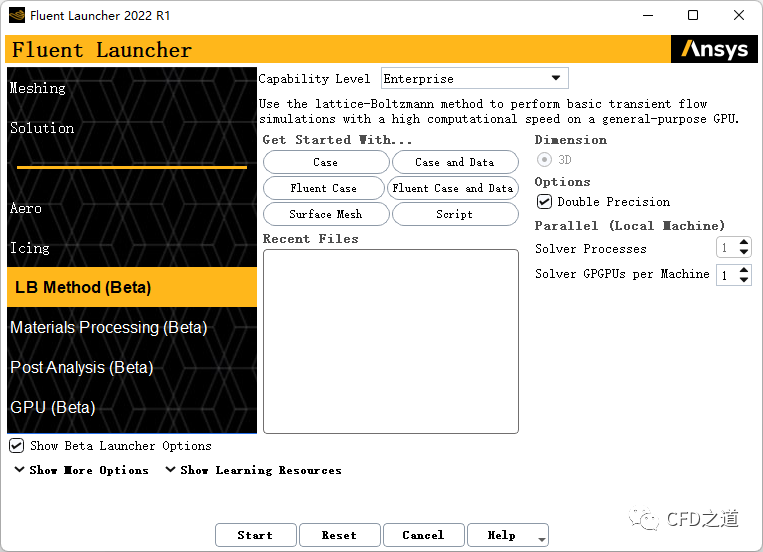
在启动界面中选择选项Show Beta Launcher Options,并选择LB Method(Beta),如下图所示
2.1 导入网格
-
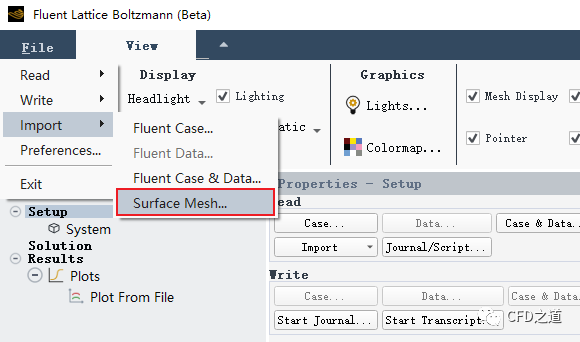
利用菜单File → Import → Surface Mesh…导入网格文件Skyscraper.msh
查看网格的话可以采用下面的步骤:
-
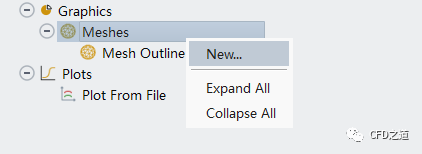
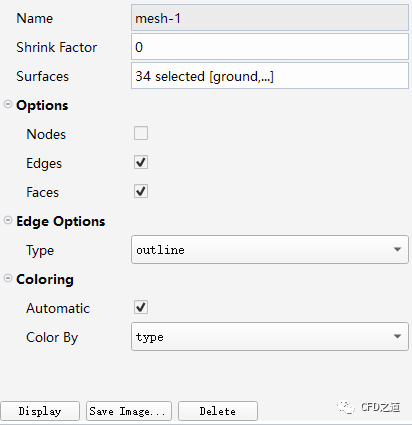
右键选择模型树节点Graphics → Meshes,点击弹出菜单项New… 打开设置对话框
-
如下所示设置 -
选择要查看的 Surfaces -
选择 Type为outline只显示轮廓,若选择为feature或all则显示网格 -
点击按钮Display 查看
如下图所示为查看几何模型。
2.2 创建网格
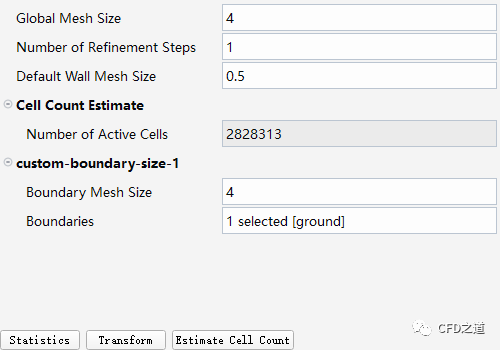
可以为特定区域单独加密网格。如下面的操作:
-
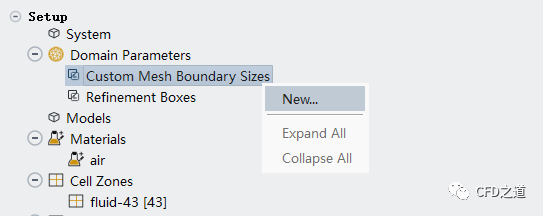
右键选择模型树节点Domain Parameters → Custom Mesh Boundary Sizes,点击弹出菜单项**New…**打开设置对话框
-
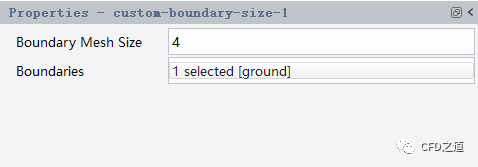
如下图所示指定边界 ground的网格尺寸为4
点击模型树节点Domain Parameters ,在弹出的面板中设置网格参数,点击按钮Statistis可以在TUI窗口查看网格信息。
2.3 Models设置
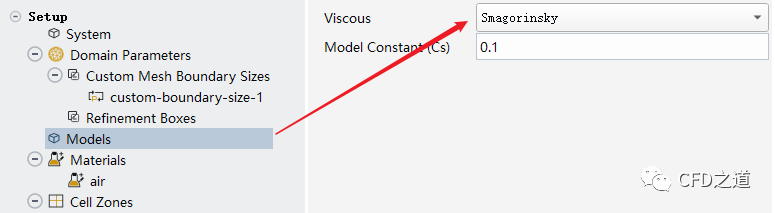
-
点击模型树节点Models,如下图所示,保持默认模型Smagorinsky
2.4 边界条件
-
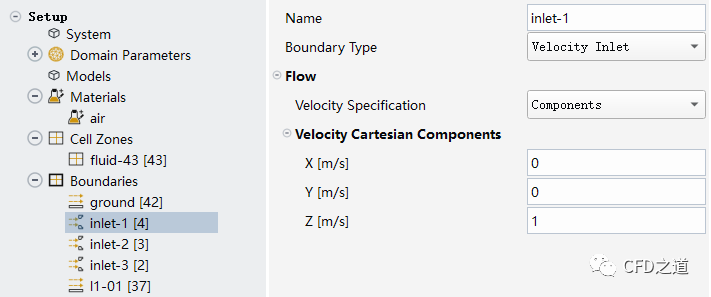
如下图所示设置边界 inlet-1的速度为z方向1 m/s
-
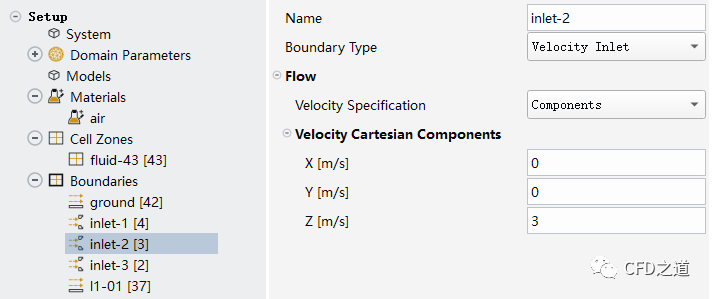
设置边界 inlet-2的速度为z方向3 m/s
-
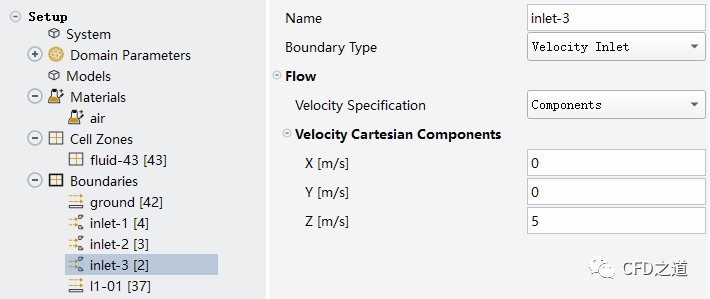
设置边界 inlet-3的速度为z方向5 m/s
2.5 定义监测
-
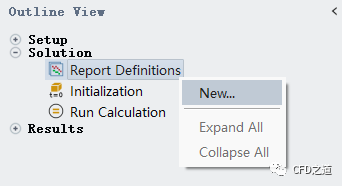
右键选择模型树节点Report Definitions ,点击弹出菜单项New… 打开设置对话框
-
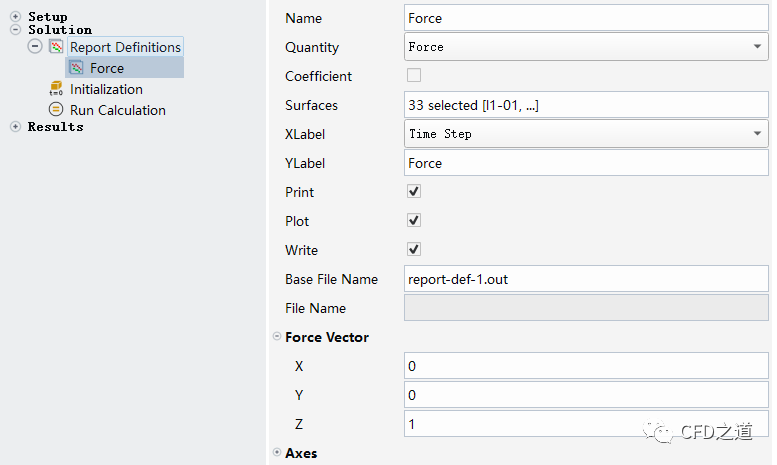
如下图所示监测参数,监测除ground之外的所有wall边界
2.6 初始化计算
-
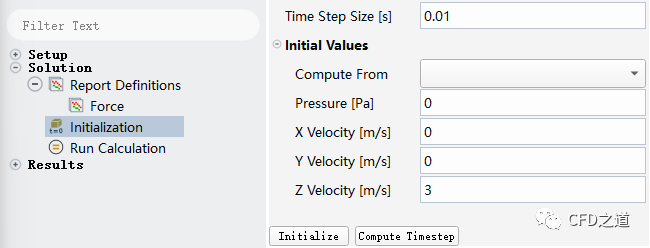
设置时间步长0.01s ,指定初始速度z方向3 m/s ,点击按钮Initialize 进行初始化
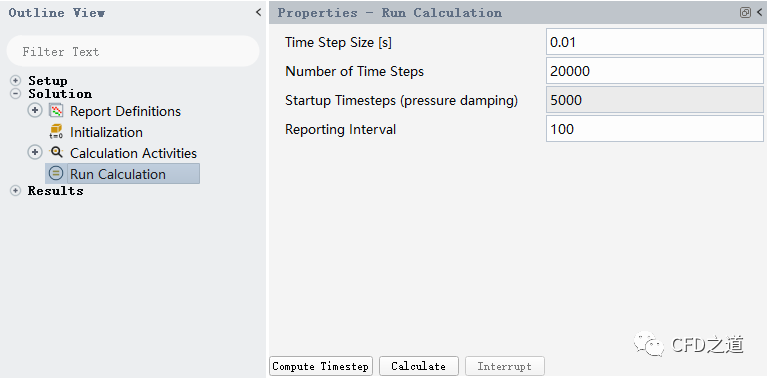
2.7 进行计算
-
指定计算参数并进行计算
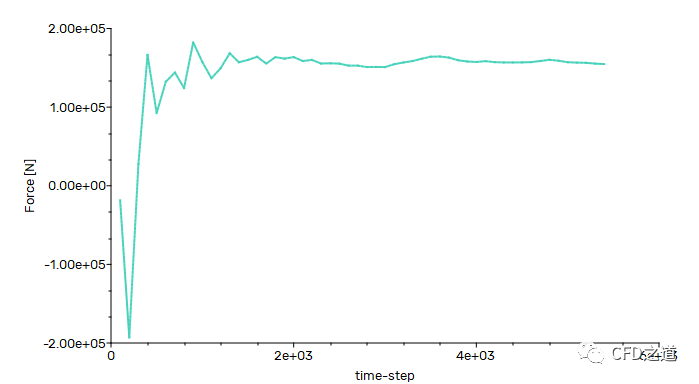
3 计算结果
虽然算得比较快,不过还是懒得等了,这里大概算了几千步。
-
作用在壁面上的力如下图所示,基本上已经稳定了
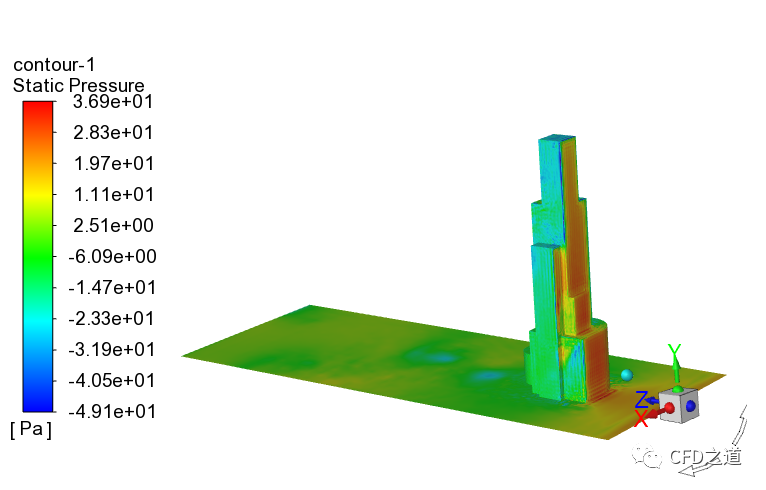
-
压力分布
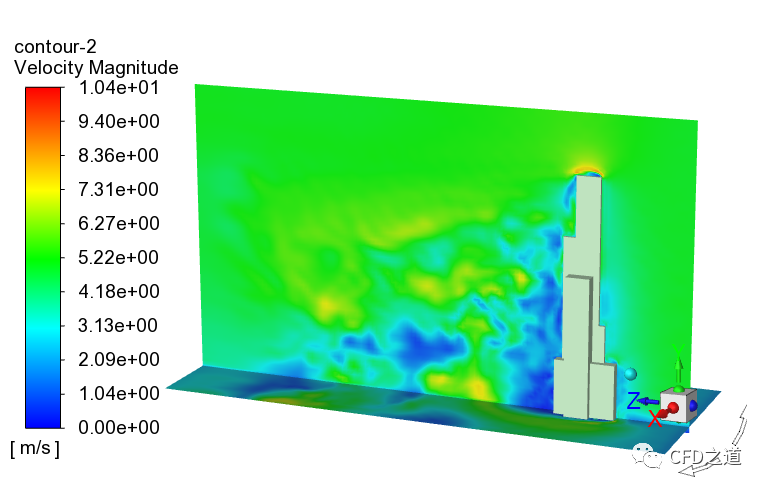
-
切面上速度分布
文件下载:https://pan.baidu.com/s/1iemgwmTrAok6mulf1afCgw?pwd=esxw 提取码:esxw
”
从文档提供的信息来看,Fluent中提供的LB方法并没有发现有什么优势,不过支持GPU计算的LB方法似乎有点儿新意。本案例取自Fluent beta文档。
(本文完毕)
本篇文章来源于微信公众号: CFD之道


评论前必须登录!
注册